In this series I'm going to show you one way to get your Erlang stack up & running on Google Compute Engine.


By the end of this tutorial you should be able to have an Erlang based web server with all the good stuff:
1. Your website will be reachable from the internet and ready for real-world traffic.
2. We will be using Erlang MVC style - with controllers responsible for exposing RESTful API's for our app, and views using Django style templates. We'll be doing this with the ChicagoBoss framework (Rails style framework for Erlang).
3. We will have an Angular JS frontend that consumes the above mentioned REST API.
4. We will persist data to a NOSQL Store
5. You'll start kicking ass
Google compute Engine is a part of the Google Cloud Platform Offering. It allows you to leverage Google's, well, Google-class infrastructure, for your own needs - whatever they may be.
So in part I of the tutorial, we're going to configure and install our Compute Engine instance, install all dependencies required by our Erlang based server.
Setting up Compute Engine
The first step would be telling Google Cloud Platform console that we'd like to create ourselves a shiny new instance. Go to: https://cloud.google.com/console and choose "Create Project". Choose a name for your project, and then click on the Compute Engine line.
At this stage you are going to be prompted to enter some billing info. Don't worry, you won't pay anything till you start using the instance.
Once billing information is entered, you'll be redirected to the Compute Engine Instances Page. There, choose "New Instance".
For the purpose of experimenting, you can use the most basic option: a debian linux image with a micro instance. In other words, leave all default parameters as is, and only change the "Machine Type" to "f1-micro".
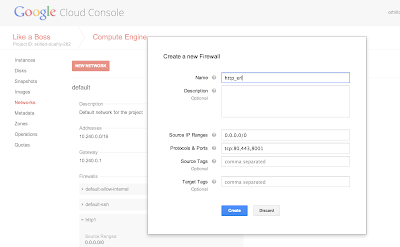
Our Erlang website is going to use port 8001, so head over to the Network section, click on "Default" network row, and under the Firewalls section, choose "Create New". Add an entry called "http_erl" and Allowed Protocols or Ports: tcp:80,443,8001.
At this point we are ready to SSH into our server and configure our web server environment on our newly born linux. Get you your main "All instances" page (console home) and click and the instance we've created. scroll down and locate the "SSH" hyperlink. click on it, and copy the command from the dialog.
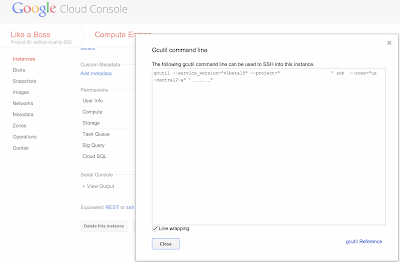
To ssh into your instance, you will be needing gcutil. Get if from here.
The command that we are going to type should look like this:
gcutil --service_version="v1beta15" --project="your-project-name" ssh --zone="us-central2-a" "your-instance-name".
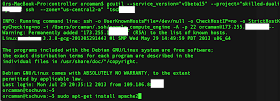
after running the gcutil command, you will be prompted by the terminal to browse to a web page that contains your signature. This signature is required for you to log in to your remote server. /browse to that page and copy the signature. use that signature back in the terminal and confirm.
To test your server and have some kick ass utils such as apache bench, we will install Apache, even though we won't be using it at this stage.
To install apache, type:
sudo apt-get install apache2
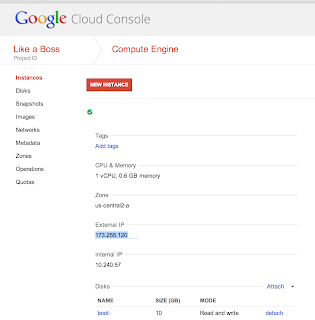
Locate your sites external IP address (it's on your instance page) and browse to http://<your-external-ip-address>.
If all is well, you should get the standard apache welcome page:

Use this command to install the required erlang dependency packages:
sudo apt-get install build-essential libncurses5-dev openssl libssl-dev fop xsltproc unixodbc-dev
Download and install erlang:
wget http://erlang.org/download/otp_src_R15B01.tar.gz
tar zxvf otp_src_R15B01.tar.gz
cd otp_src_R15B01
./configure && make && sudo make install
Download ChicagoBoss:
wget http://www.chicagoboss.org/ChicagoBoss-0.8.7.tar.gz
Extract:
tar zxvf ChicagoBoss-0.8.7.tar.gz
Install and generate our sample app from the CB skeleton (call it erlang_gc):
cd ChicagoBoss
./rebar compile
make
make app PROJECT=erlang_gc
cd ../erlang_gc
The above mentioned likes will create a bootstrap application under erlang_gc. Now head over to the controllers folder and create your first controller. cd to:
src/controller
and type:
sudo nano erlang_gc_sample_controller.erl
this will fire up nano text editor that we are going to use in order to create our first sample controller.
paste the following into nano:
-module(erlang_gc_sample_controller, [Req]).
-compile(export_all).
hello('GET', []) ->
{json, [{someNode, "some contnet"}]}.
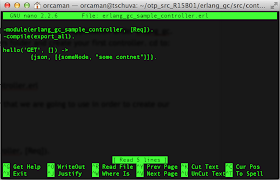
Type ctrl + X to exit, and then type Y and Enter to save.
That's it! we are ready to run our dev server. Get to the site root (../erlang_gc) and type:
./init-dev.sh
And Voila - we have an erlang based restful API that returns JSON:
browse to <your-external-ip-address>:8001/sample/hello
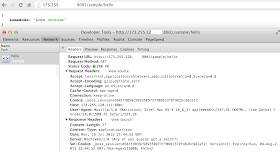
on the next post, we'll add some Angular JS goodness to our app and consume JSON API's from our erlang app.
Happy Coding!
No comments:
Post a Comment